Phone Security Basics That Actually Matter
Your phone holds more about you than any other object you own. Bank accounts, messages, photos, location history, work email, health data, contacts, calendar, authentication codes for every other account you have. Physical access to an unlocked phone is access to everything.
Phone security isn't about paranoia. It's about configuring the device to match the threat model you actually face. Most people will never encounter sophisticated attackers. Most people will encounter opportunistic theft, accidental loss, malicious apps disguised as utilities, and phishing attempts delivered through text or app notifications. The settings that matter are the ones that defend against those scenarios.
This is a practical guide. Every recommendation here is something you can configure today. No specialized knowledge required. No expensive tools. Just the settings already built into your phone, explained in the order that makes sense to apply them.
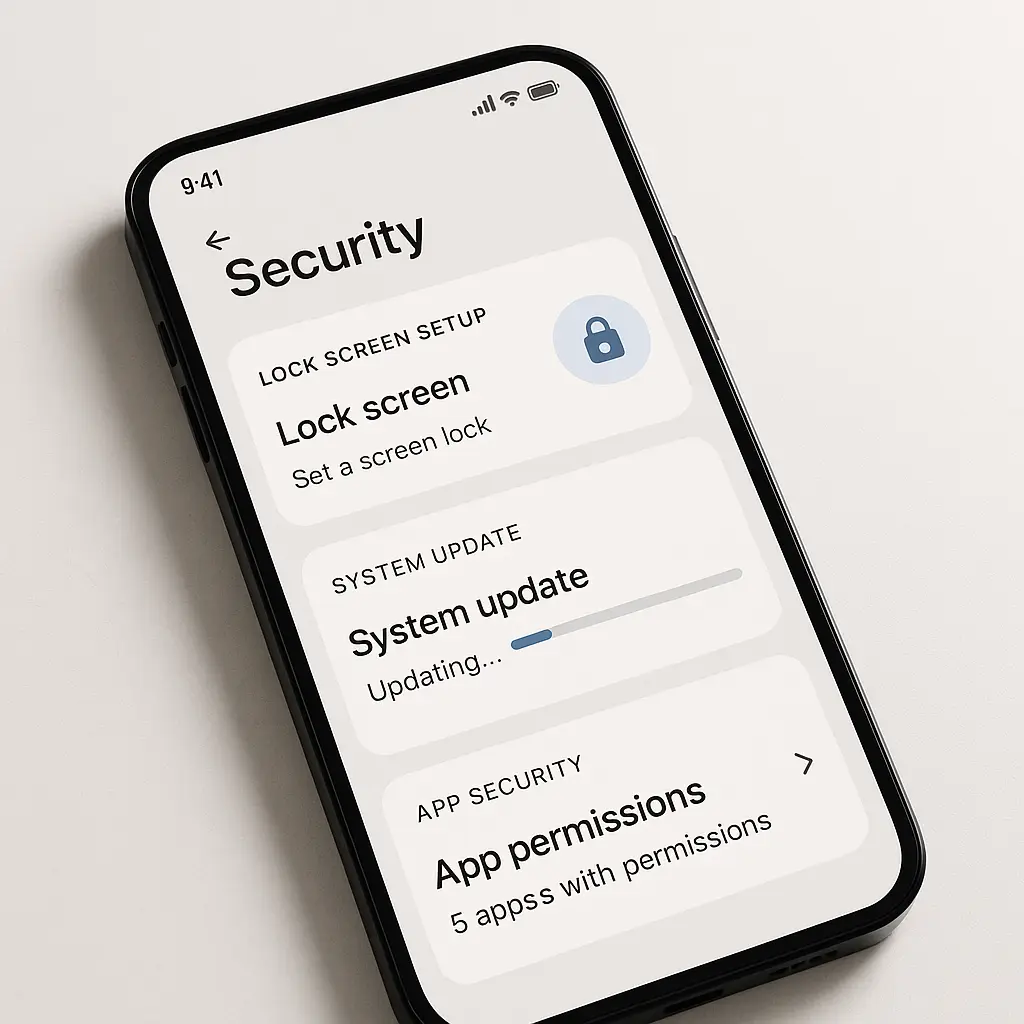
Lock Your Screen With Something Stronger Than Four Digits
The lock screen is the first line of defense. Without it, anyone who picks up your phone has immediate access to everything on it. A four-digit PIN takes seconds to guess if someone has physical access and a few tries. A six-digit PIN is better. A longer alphanumeric passcode is better still.
In Clarke's 2001: A Space Odyssey, HAL controls every entry point on the Discovery. Nothing moves without authentication. Your phone's lock screen is supposed to work the same way. Without it, anyone who picks up your device has immediate access to your email, banking, messages, and anything else the phone can reach.
Biometric locks (fingerprint, face recognition) are convenient and reasonably secure for everyday use. They authenticate you quickly and resist casual observation. But they're not perfect. Someone can hold your phone to your face while you're asleep, injured, or restrained. Law enforcement in many jurisdictions can compel you to unlock with biometrics but not to provide a passcode. If that matters to your situation, configure a strong passcode as the primary method and use biometrics as a convenience layer.
Apple's guidance on passcodes recommends alphanumeric codes over numeric PINs. Android offers similar options in the security settings. The longer the passcode, the more attempts an attacker needs to guess it. A six-character alphanumeric passcode has around 2 billion possible combinations. An eight-character one has over 200 trillion.
Set your phone to require the passcode immediately when the screen locks. Delayed lock settings (requiring the passcode only after 5 minutes, 15 minutes, etc.) create a window where someone who grabs your phone can access it without authentication. Immediate lock is inconvenient. It's also effective.
Configure the phone to erase itself after 10 failed passcode attempts. This setting protects against brute-force attacks where someone systematically tries every possible code. It also protects against theft scenarios where the attacker has time and tools. iOS and Android both support this feature. Enable it.
Install Updates When They Arrive
Security updates patch vulnerabilities that attackers already know about. When your phone prompts you to install an update, that update likely addresses a flaw that researchers or attackers have discovered. Delaying the update means running software with known weaknesses.
CISA's mobile device guidance emphasizes timely updates as a foundational control. The document lists it first, before lock screens, before app permissions, before anything else. Updates close the door on exploits. Nothing else you configure matters if the operating system itself has unpatched holes.
Delaying updates is leaving the door unlocked. Attackers with known exploit code don't need to be clever if you're running software with published vulnerabilities. A patch that's available and not installed is the same as no patch at all.
iOS updates arrive as notifications. Android updates depend on the manufacturer and carrier, but most modern devices receive monthly security patches. Install them. The inconvenience of a 10-minute update cycle is nothing compared to the inconvenience of recovering from a compromised device.
Enable automatic updates if your phone supports them. iOS allows automatic installation of security updates overnight. Android's settings vary by manufacturer, but most offer automatic update options. Configure it once, and the phone handles the rest.
Review App Permissions and Revoke What Doesn't Make Sense
Apps request access to your camera, microphone, location, contacts, photos, and more. Some apps need those permissions to function. Many don't. A flashlight app has no reason to access your contacts. A weather app doesn't need your microphone. A game doesn't need to know your precise location every minute of the day.
NIST's mobile device security guidelines recommend reviewing app permissions regularly and applying the principle of least privilege. Grant only what the app needs to perform its intended function. Revoke everything else.
iOS and Android both provide permission management interfaces. On iOS, go to Settings → Privacy & Security and review each category (Location Services, Camera, Microphone, Contacts, Photos, etc.). On Android, go to Settings → Privacy → Permission manager. Both interfaces show which apps have access to which resources.
Start with location. Many apps request "Always" location access when "While Using the App" would suffice. An app that needs your location to show nearby restaurants doesn't need to track you when you're not using the app. Change "Always" to "While Using" unless you have a specific reason to allow continuous tracking.
Review camera and microphone access next. If you don't remember granting an app access to your camera, revoke it. You can always grant it again if the app legitimately needs it. Same with the microphone. Social media apps, messaging apps, and video conferencing apps need microphone access. A PDF reader does not.
Check contacts and photos. Apps often request access to your entire contact list or photo library when they only need a single contact or a single photo. iOS allows you to grant limited access (selected photos only, selected contacts only). Use that option when available.
Install Apps Only From Official Stores
The App Store and Google Play Store aren't perfect, but they apply baseline security checks that third-party app stores and direct downloads don't. Malicious apps occasionally slip through, but the official stores remove them quickly once identified. Third-party stores have no such process.
CISA's mobile communications guidance advises against sideloading apps (installing apps from sources other than the official store). Sideloading bypasses the vetting process and increases the risk of installing malware.
On iOS, sideloading is difficult by design. On Android, it's easier but requires enabling "Install unknown apps" in the settings. Leave that setting disabled unless you have a specific, informed reason to enable it. If you do enable it, enable it only for the specific app you trust (like a file manager), not system-wide.
Avoid apps that promise functionality the platform doesn't normally allow. "Free premium subscriptions," "unlock all features," "remove ads from other apps", these are red flags. Legitimate apps don't offer those things. Malicious apps do, because they're not trying to provide a service. They're trying to gain access to your device.
Read app reviews before installing, but read them critically. Fake reviews exist. Look for patterns. If an app has thousands of five-star reviews that all say the same generic thing ("Great app! Works perfectly!"), that's suspicious. If an app has recent reviews complaining about unexpected behavior (pop-ups, battery drain, requests for strange permissions), skip it.
Enable Find My Device and Test It
If you lose your phone, you need a way to locate it, lock it remotely, or erase it. Find My iPhone (iOS) and Find My Device (Android) provide those capabilities. But they only work if you enable them before you lose the phone.
Apple's support documentation explains how to set up Find My iPhone. On iOS, go to Settings → [your name] → Find My → Find My iPhone and enable it. Enable "Send Last Location" as well, which automatically sends your phone's location to Apple when the battery is critically low.
On Android, Find My Device is usually enabled by default, but verify it. Go to Settings → Security → Find My Device and confirm it's turned on. You'll also need location services enabled for Find My Device to work.
Test the feature before you need it. Log into iCloud.com (for iOS) or android.com/find (for Android) from a computer and verify that your phone appears on the map. Make sure you can trigger a sound, lock the device, and see the erase option. Knowing how the interface works before an emergency makes the process faster when it matters.
If your phone is stolen, lock it immediately. A locked phone is harder to wipe and resell. If recovery isn't possible, erase it remotely. Erasing destroys the data but also disables Find My, so you lose the ability to track the device. Erase only as a last resort.
Turn Off Lock Screen Notifications for Sensitive Apps
Lock screen notifications are convenient. They're also visible to anyone who glances at your phone. A notification preview that shows "Your bank account balance is now $X" or "Your package from [retailer] has shipped" or "Your two-factor code is 123456" reveals information you might not want visible.
iOS and Android both allow you to control which apps show notifications on the lock screen and whether those notifications show previews. On iOS, go to Settings → Notifications, select an app, and choose "Show Previews: When Unlocked" or "Never." On Android, go to Settings → Notifications → App notifications, select an app, and toggle "Sensitive notifications" or adjust the lock screen visibility.
Banking apps, password managers, messaging apps with sensitive conversations, and authentication apps should not show previews on the lock screen. You can still receive the notification, you just won't see the content until you unlock the phone.
Two-factor authentication codes are a particular risk. If your phone displays the code in a lock screen notification, anyone who has physical access to your phone for a few seconds can see it. That defeats the purpose of two-factor authentication. Configure your authenticator app to hide previews.
Use a Password Manager and Enable Autofill
Your phone is where you access most of your accounts. Using strong, unique passwords for each account requires a password manager. Reusing passwords across accounts turns one breach into a skeleton key. I've written about why password reuse is the worst security habit and how password managers work in detail elsewhere.
On your phone, a password manager integrates with the system autofill feature. When you log into an app or website, the password manager offers to fill your credentials automatically. This is faster than typing and eliminates the risk of typos or phishing (the password manager won't autofill on a fake login page because the domain won't match).
iOS includes iCloud Keychain, which syncs passwords across Apple devices. Android includes Google Password Manager, which syncs across devices signed into your Google account. Both are adequate for most people. If you need cross-platform sync or additional features, third-party managers like NordPass integrate with iOS and Android autofill.
Enable autofill in your phone's settings. On iOS, go to Settings → Passwords → AutoFill Passwords and select your password manager. On Android, go to Settings → Passwords & accounts → Autofill service and select your password manager.
Generate new passwords through the password manager when creating accounts. Don't reuse passwords. Don't use passwords you can remember. Let the manager generate and store them.
Disable Bluetooth and WiFi When You're Not Using Them
Bluetooth and WiFi create attack surfaces. When enabled, your phone broadcasts its presence and listens for connections. Most of the time, nothing happens. Occasionally, vulnerabilities in Bluetooth or WiFi stacks allow attackers to exploit devices within range.
I'm not saying turn them off permanently. I'm saying turn them off when you're not actively using them. If you're not connected to a WiFi network and not expecting to connect to one, disable WiFi. If you're not using Bluetooth headphones or a car connection, disable Bluetooth.
CISA's mobile communications best practices recommend disabling unused wireless features to reduce exposure. The document specifically mentions Bluetooth and WiFi as vectors for proximity-based attacks.
Disabling WiFi also prevents your phone from automatically connecting to networks you've used before. Public WiFi networks (coffee shops, airports, hotels) are often unencrypted or poorly secured. If your phone auto-connects to a network named "Free Airport WiFi," you don't know who's running that network. Disable auto-join for public networks and manually connect only when you need to.
The same logic applies to Bluetooth. Your phone remembers paired devices and will reconnect automatically when in range. If you've paired your phone with a rental car or a friend's speaker, unpair it when you're done. Otherwise, your phone will attempt to reconnect every time it detects that device, creating an opportunity for someone to impersonate it.
Be Skeptical of Antivirus Apps on Phones
Antivirus software on phones is mostly unnecessary and sometimes counterproductive. iOS doesn't allow third-party apps to scan the system or other apps, so "antivirus" apps on iOS can't function the way they do on computers. They're usually VPNs or ad blockers marketed as security tools.
On Android, antivirus apps have more access, but they're not as useful as keeping the system updated and avoiding sketchy apps. Bitdefender offers a mobile antivirus product with a reasonable reputation, but for most people, the built-in protections (Google Play Protect, regular updates, permission controls) provide better security than a third-party app that constantly runs in the background, drains battery, and requests broad permissions.
If you install an antivirus app, research it first. Look for apps from established security companies with transparent privacy policies. Avoid free antivirus apps that monetize through ads or data collection. The app you install to protect your privacy shouldn't be harvesting your data.
Google Play Protect scans apps on Android devices and removes malicious ones. It runs automatically. You don't need to install anything. Verify it's enabled by going to Settings → Security → Google Play Protect.
Configure Two-Factor Authentication for Critical Accounts
Two-factor authentication (2FA) adds a second layer of security beyond your password. Even if someone steals your password, they can't access your account without the second factor. I've written a detailed guide on how 2FA works and which methods to use, but the short version: use authenticator apps (Google Authenticator, Authy, or similar) or hardware keys (YubiKey, Titan Key) for important accounts. Avoid SMS-based 2FA when better options exist.
On your phone, install an authenticator app and configure it for your email, banking, password manager, and any other account that supports it. The app generates time-based codes that expire after 30 seconds. When you log in, you enter your password and then the current code from the app.
Authenticator apps work offline. They don't require cell service or internet access. That makes them more reliable than SMS and harder to intercept. SMS codes can be stolen through SIM swapping (where an attacker convinces your carrier to transfer your number to a new SIM card). Authenticator apps can't be stolen that way.
Store backup codes somewhere safe. When you enable 2FA, most services provide a set of one-time backup codes you can use if you lose access to your authenticator app. Write them down, store them in your password manager, or save them in a secure location. If you lose your phone and don't have backup codes, you may lose access to your accounts.
Review Installed Apps and Remove What You Don't Use
Apps you don't use are apps you don't update. Apps you don't update accumulate vulnerabilities. Apps with vulnerabilities become entry points.
Go through your installed apps and delete anything you haven't used in the past three months. On iOS, go to Settings → General → iPhone Storage to see a list of apps sorted by size and last used date. On Android, go to Settings → Apps and review the list.
Some apps you'll recognize immediately as unused. Others you'll remember installing once for a specific purpose and never opening again. Delete them. If you need them later, you can reinstall them. The risk of keeping them installed outweighs the convenience of having them available.
Pay attention to apps that request permissions you don't remember granting. If an app you rarely use has access to your location, camera, or contacts, revoke those permissions or delete the app. There's no reason for an app you don't use to have access to sensitive resources.
Encrypt Your Phone (It's Probably Already Encrypted)
Modern phones encrypt data by default. iOS has encrypted storage since the iPhone 3GS. Android has required encryption since version 6.0 (released in 2015). If your phone is from the last decade and you've set a lock screen passcode, your data is encrypted.
Encryption protects your data if someone physically removes the storage from your phone. Without the encryption key (derived from your passcode), the data is unreadable. This matters in theft scenarios and in situations where someone has physical access to your powered-off device.
You can verify encryption status on Android by going to Settings → Security → Encryption. On iOS, encryption is always enabled if you have a passcode set. There's no toggle to disable it.
Encryption doesn't protect against someone unlocking your phone with your passcode or biometrics. It protects against someone bypassing the lock screen entirely by accessing the storage directly. For that reason, encryption and a strong lock screen passcode work together. One without the other leaves gaps.
Understand What Rebooting Your Phone Does for Security
Rebooting your phone after a period of inactivity strengthens security in specific scenarios. When you reboot, the phone enters a "Before First Unlock" (BFU) state where encryption keys are not loaded into memory. In this state, the phone is harder to access through forensic tools.
After you unlock the phone once, it enters an "After First Unlock" (AFU) state where some encryption keys remain in memory to allow background processes (notifications, app updates, etc.) to function. AFU is the normal operating state. It's convenient. It's also slightly less secure than BFU.
CISA's mobile communications guidance recommends rebooting your phone weekly as a general security hygiene practice. This clears temporary data, closes background processes, and forces the phone back into BFU state until you unlock it again.
Rebooting also clears certain types of malware that run in memory but don't persist across reboots. Not all malware behaves this way, but some does. A weekly reboot reduces the window for memory-resident threats.
This isn't a substitute for other security measures. It's an additional layer. Reboot your phone once a week. It takes 30 seconds.
Disable USB Accessories When Locked
USB Restricted Mode (iOS) and USB debugging (Android) control what happens when you connect your phone to a computer or accessory while the phone is locked. By default, modern phones disable data transfer over USB when locked, allowing only charging. This protects against attacks that use USB connections to extract data or install malware.
On iOS, USB Restricted Mode activates automatically after the phone has been locked for one hour. You can't disable it, and you shouldn't try. It's a reasonable security measure that doesn't interfere with normal use.
On Android, USB debugging is a developer feature that allows computers to send commands to the phone. It should be disabled unless you're actively developing Android apps. Go to Settings → About phone and tap "Build number" seven times to enable Developer options. Then go to Settings → System → Developer options and verify that "USB debugging" is disabled.
If you connect your phone to a computer and see a prompt asking to "Trust This Computer," think before you tap yes. Trusting a computer gives it access to your phone's data. Trust your own computer. Don't trust a public charging station or a computer you don't control.
Know What to Do If Your Phone Is Compromised
If you suspect your phone has been compromised (unusual behavior, unexpected battery drain, apps you didn't install, settings changes you didn't make), take it seriously.
First, disconnect from networks. Turn off WiFi, Bluetooth, and cellular data. This limits what the attacker can access remotely while you assess the situation.
Second, review installed apps. Go through the app list and look for anything unfamiliar. Malicious apps often disguise themselves with generic names or icons that resemble system apps. Delete anything you don't recognize.
Third, review app permissions. Check which apps have access to location, camera, microphone, contacts, and other sensitive resources. Revoke permissions for anything suspicious.
Fourth, change your passwords. Start with your email and password manager, then move to banking and other critical accounts. Use a trusted computer or a different device, not the compromised phone.
Fifth, check for unauthorized account activity. Log into your email, banking, and social media accounts from a trusted device and review recent activity. Look for logins from unfamiliar locations, password reset requests you didn't initiate, or messages you didn't send.
If you can't identify the source of the compromise or can't remove it, reset the phone to factory settings. This erases everything and reinstalls the operating system. Back up your data first if possible, but be aware that backing up a compromised phone might preserve the malware. If you're unsure, skip the backup and reset.
After resetting, restore only from sources you trust. Don't restore from a backup made while the phone was compromised. Reinstall apps manually from the official store. Reconfigure settings from scratch.
The Checklist
Here's what to configure today:
- Set a strong lock screen passcode (six digits minimum, alphanumeric preferred)
- Enable biometric unlock (fingerprint or face) as a convenience layer
- Set the phone to require passcode immediately when locked
- Enable automatic device erase after 10 failed passcode attempts
- Install system updates as soon as they're available
- Enable automatic updates if your phone supports them
- Review app permissions and revoke access that doesn't make sense
- Change location permissions from "Always" to "While Using" where appropriate
- Enable Find My iPhone or Find My Device
- Test Find My from a computer to verify it works
- Configure lock screen notifications to hide previews for sensitive apps
- Install a password manager and enable system autofill
- Generate new passwords for accounts where you've reused passwords
- Disable Bluetooth and WiFi when not actively using them
- Disable auto-join for public WiFi networks
- Verify Google Play Protect is enabled (Android) or that you're installing apps only from the App Store (iOS)
- Configure two-factor authentication for email, banking, and password manager
- Store 2FA backup codes somewhere safe
- Review installed apps and delete anything unused
- Reboot your phone once a week
- Verify USB debugging is disabled (Android) or that USB Restricted Mode is active (iOS)
That's the list. Work through it at your own pace. Each item takes a few minutes. Together, they address the threats you're most likely to face.
Your phone is already reasonably secure by default. These steps make it significantly more secure. They won't stop nation-state attackers or protect against physical forensics by well-funded adversaries. They will stop opportunistic theft, casual snooping, phishing attempts, and most malware. That's the threat model that matters for most people.