Setting Up Passkeys on Your Accounts: Step-by-Step Setup for Passkey Authentication
Passkeys are the authentication method that finally delivers on the promise passwords never kept: secure, convenient, and resistant to phishing. They use public-key cryptography instead of shared secrets, which means there's nothing for attackers to steal from a database breach and no credential for you to accidentally hand over to a fake login page.
I've spent the last six months enabling passkeys across every account that supports them, and the setup process is straightforward once you understand what's actually happening. Here's the step-by-step walkthrough for Google, Microsoft, Apple, and other major services, what each configuration choice means, and how to manage passkeys long-term.
What You're Actually Setting Up
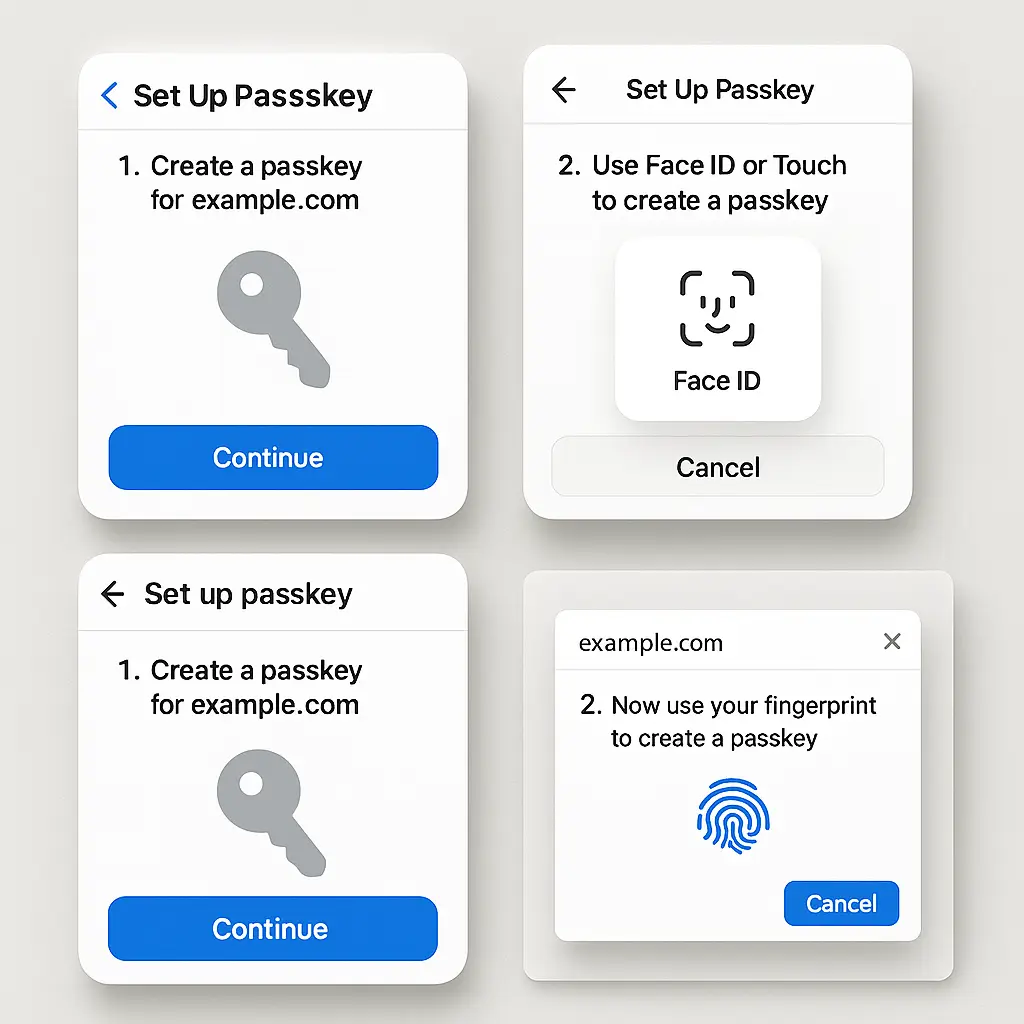
When you enable a passkey, you're creating a cryptographic key pair. The private key stays on your device or in your password manager. The public key goes to the service. When you authenticate, the service sends a challenge, your device signs it with the private key, and the service verifies the signature with the public key. No password travels across the network. No shared secret exists for attackers to steal.
This is the mechanism NIST describes in its digital identity guidelines as authenticator assurance level 2 or 3, depending on implementation. It's the same cryptographic foundation that hardware security keys use, but built into your devices and password managers instead of requiring a separate physical token.
Passkeys sync across devices through your password manager or platform-specific systems like iCloud Keychain, Google Password Manager, or Windows Hello. When you set up a passkey on one device, it becomes available on all devices signed into the same account. This solves the "lost device" problem that plagued early hardware key deployments.
Before You Start
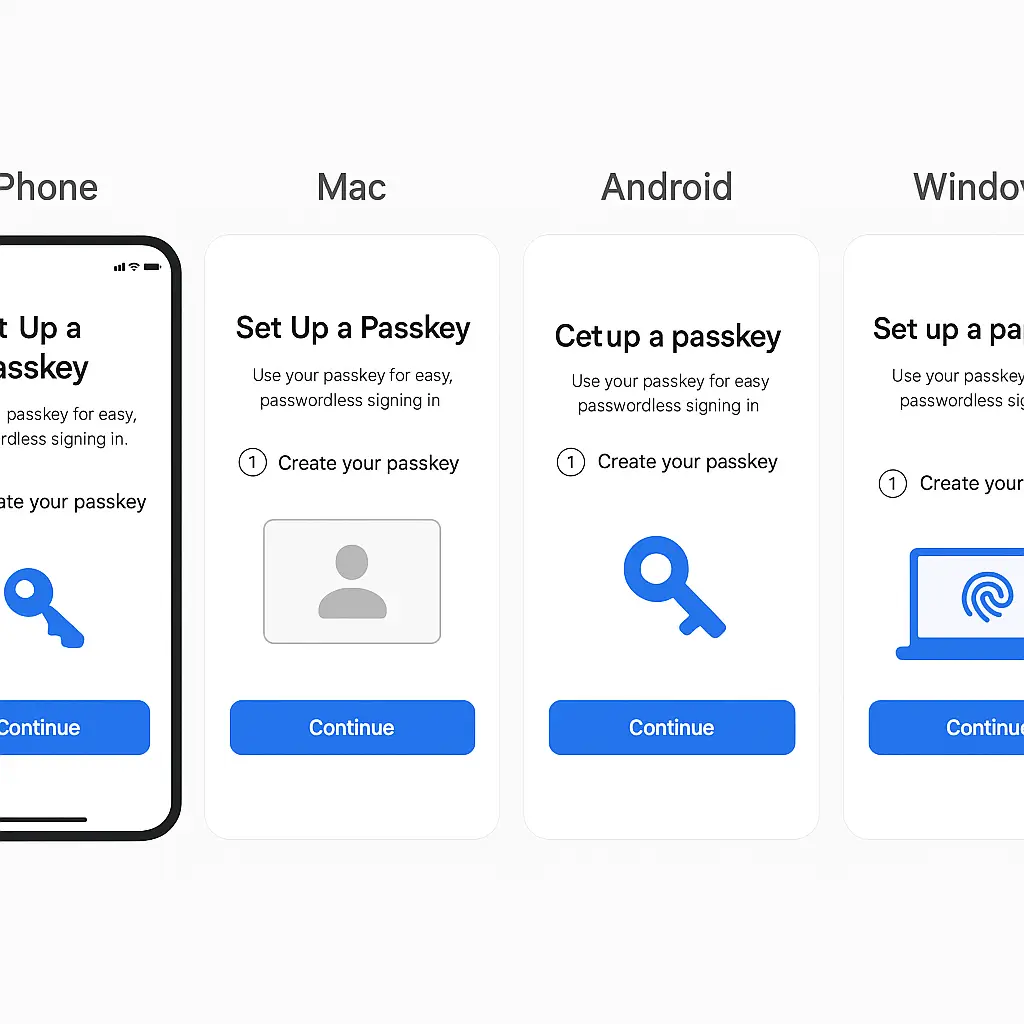
You need a device and browser that support passkeys. Most devices manufactured after 2020 support them: iPhones running iOS 16 or later, Android phones running Android 9 or later, Windows 10 or later, and macOS Ventura or later. Browsers need to be current: Chrome 109+, Safari 16+, Edge 109+, or Firefox 122+.
Check your password manager. Bitwarden, 1Password, Dashlane, and NordPass all support passkey storage and sync. If your password manager doesn't support passkeys yet, you can use your operating system's built-in credential manager: iCloud Keychain on Apple devices, Google Password Manager on Android and Chrome, or Windows Hello on Windows.
Decide where you want to store passkeys. I use Bitwarden because it syncs across all my devices regardless of platform. If you're locked into one ecosystem, all Apple devices, for instance, iCloud Keychain works well and requires no additional software. The tradeoff is portability: platform-specific managers don't transfer easily if you switch ecosystems.
Understand that you'll run both passwords and passkeys for a while. Most services don't let you disable passwords entirely when you enable passkeys. This is intentional: passkeys are additive, not replacement. You authenticate with a passkey when possible and fall back to passwords when necessary.
Setting Up Passkeys on Google
Google's passkey implementation is mature and works across all Google services: Gmail, Drive, YouTube, and everything else tied to your Google account. The setup process takes around three minutes.
Sign into your Google account and navigate to myaccount.google.com. Click "Security" in the left sidebar, then scroll to "How you sign in to Google." Click "Passkeys and security keys."
Click "Create a passkey." Google will prompt you to verify your identity using your current authentication method, usually your password and any 2FA you have enabled. This verification confirms you're authorized to add new authentication methods.
The browser will show a prompt asking where to save the passkey. The options vary by device and browser. On an iPhone using Safari, you'll see "iCloud Keychain" as the default option. On Windows using Chrome, you'll see "Windows Hello" or "This device." On any device using a password manager extension, you'll see the password manager as an option.
Choose where to save it. I select my password manager (Bitwarden) because I want the passkey available across all my devices and platforms. If you choose a platform-specific option like iCloud Keychain, the passkey syncs only within that ecosystem.
The system will prompt for biometric authentication, Face ID, fingerprint, or Windows Hello PIN. This unlocks the credential store and authorizes the passkey creation. The biometric check is local to your device; nothing about your face or fingerprint travels to Google.
Google confirms passkey creation and shows it in your security settings. The entry displays the device or service where the passkey is stored and the date you created it. You can create multiple passkeys, one stored in your password manager, one in iCloud Keychain, one in Windows Hello, and use whichever is convenient at the moment.
Test it immediately. Sign out of your Google account and sign back in. When prompted for your password, look for "Use a passkey" or a similar option. Click it, and your browser will prompt for biometric authentication. Authenticate, and you're in. No password typed, no 2FA code entered.
Setting Up Passkeys on Microsoft
Microsoft's passkey support covers personal Microsoft accounts and work/school accounts managed through Entra ID (formerly Azure AD). The process differs slightly depending on account type, but the underlying mechanism is identical.
Sign into your Microsoft account at account.microsoft.com. Click "Security" at the top, then "Advanced security options." Scroll to "Additional security" and click "Add a new way to sign in or verify."
Select "Use your Windows device" if you're on a Windows PC, "Use your Android device" if you're on Android, or "Use a security key" if you're setting up a hardware key. The "Use your Windows device" option creates a passkey stored in Windows Hello. The "Use your Android device" option creates a passkey stored in Google Password Manager on your Android phone.
If you're using a password manager, look for "Passkey" as an option in the list. Not all password managers appear in Microsoft's authentication flow yet, Bitwarden does, 1Password does, but support varies. If your password manager isn't listed, you can still create a passkey using Windows Hello or your phone, then manually add the passkey to your password manager later if it supports import.
Microsoft will prompt you to verify your identity with your current password and any 2FA you have active. Enter them. Then the system prompts for biometric authentication to create the passkey. On Windows, this is Windows Hello, face, fingerprint, or PIN. On Android, it's your phone's biometric unlock.
The passkey appears in your Microsoft account security settings under "Additional security options." It shows the device name and creation date. You can add multiple passkeys for different devices.
Test it. Sign out and sign back in. At the password prompt, click "Sign-in options" and select "Passkey." Your device prompts for biometric authentication, and you're in.
For work or school accounts, the process depends on your organization's policies. Some organizations enable passkeys through Entra ID and let you set them up the same way. Others restrict authentication methods to specific options. If you don't see passkey options in your work account settings, your IT department hasn't enabled them yet. You can't bypass this, organizational policy controls authentication methods for managed accounts.
Setting Up Passkeys on Apple
Apple's passkey implementation is tightly integrated with iCloud Keychain. If you use Apple devices exclusively, this is the smoothest experience. If you use multiple platforms, you'll want to store passkeys in a cross-platform password manager instead.
On an iPhone or iPad, go to Settings → [Your Name] → Sign-In & Security → Sign in with Passkey. On a Mac, go to System Settings → [Your Name] → Sign-In & Security → Passkeys.
Tap "Add a Passkey" or "Create a Passkey." Apple prompts for Face ID, Touch ID, or your device passcode. Authenticate. The passkey is created and stored in iCloud Keychain, which syncs it across all your Apple devices signed into the same iCloud account.
The passkey appears in Settings under "Passkeys" with the date created and the devices where it's available. You can create multiple passkeys if you want one stored outside iCloud Keychain, in a password manager, for example.
Test it by signing out of your Apple ID on one device and signing back in. When prompted for your password, look for "Sign in with Passkey." Tap it, authenticate with Face ID or Touch ID, and you're in.
Apple's passkey system also works on the web. When you visit appleid.apple.com and sign in, you can use your passkey instead of your password. The browser prompts for biometric authentication, verifies the passkey, and logs you in.
Setting Up Passkeys on Other Major Services
PayPal, eBay, and Best Buy support passkeys. The process is similar across all three: navigate to account security settings, look for "Passkeys" or "Sign-in options," and follow the prompts to create a passkey.
For PayPal, sign in and go to Settings → Security → Passkeys. Click "Set up passkey" and follow the prompts. PayPal supports passkeys stored in password managers, iCloud Keychain, Google Password Manager, and Windows Hello.
For eBay, sign in and go to Account Settings → Personal Information → Sign in options. Look for "Passkeys" and click "Add a passkey." eBay's implementation is straightforward and supports the same storage options as PayPal.
For Best Buy, sign in and go to Account → Account Settings → Sign-in & Security → Passkeys. Click "Add passkey" and follow the prompts. Best Buy's passkey support is newer and occasionally shows rough edges, some users report needing to try setup twice before it works.
GitHub supports passkeys for developer accounts. Sign in, go to Settings → Password and authentication → Passkeys, and click "Add a passkey." GitHub's implementation is solid and supports hardware keys, password managers, and platform-specific credential stores.
The pattern is consistent: find the security settings, look for "Passkeys" or "Sign-in options," and follow the prompts. The service verifies your identity, prompts for biometric authentication, and creates the passkey.
Managing Multiple Passkeys
You can create multiple passkeys for the same account and store them in different places. I have three passkeys for my Google account: one in Bitwarden, one in iCloud Keychain, and one in Windows Hello. This redundancy means I can authenticate from any device I own without needing to sync credentials across incompatible systems.
Each passkey is independent. Revoking one doesn't affect the others. This is useful if you lose a device or switch platforms. You revoke the lost device's passkey from your account security settings, and your other passkeys continue working.
To revoke a passkey, go to the service's security settings, find the list of passkeys, and delete the one you no longer need. The service removes the associated public key, and that passkey stops working immediately. The private key remains on your device or in your password manager, but it's useless without the corresponding public key on the service.
Naming passkeys helps when you manage multiple. Most services let you label each passkey, "iPhone," "Windows laptop," "Bitwarden," and similar. Use descriptive names so you know which passkey corresponds to which device or storage location.
When Passkeys Aren't Available
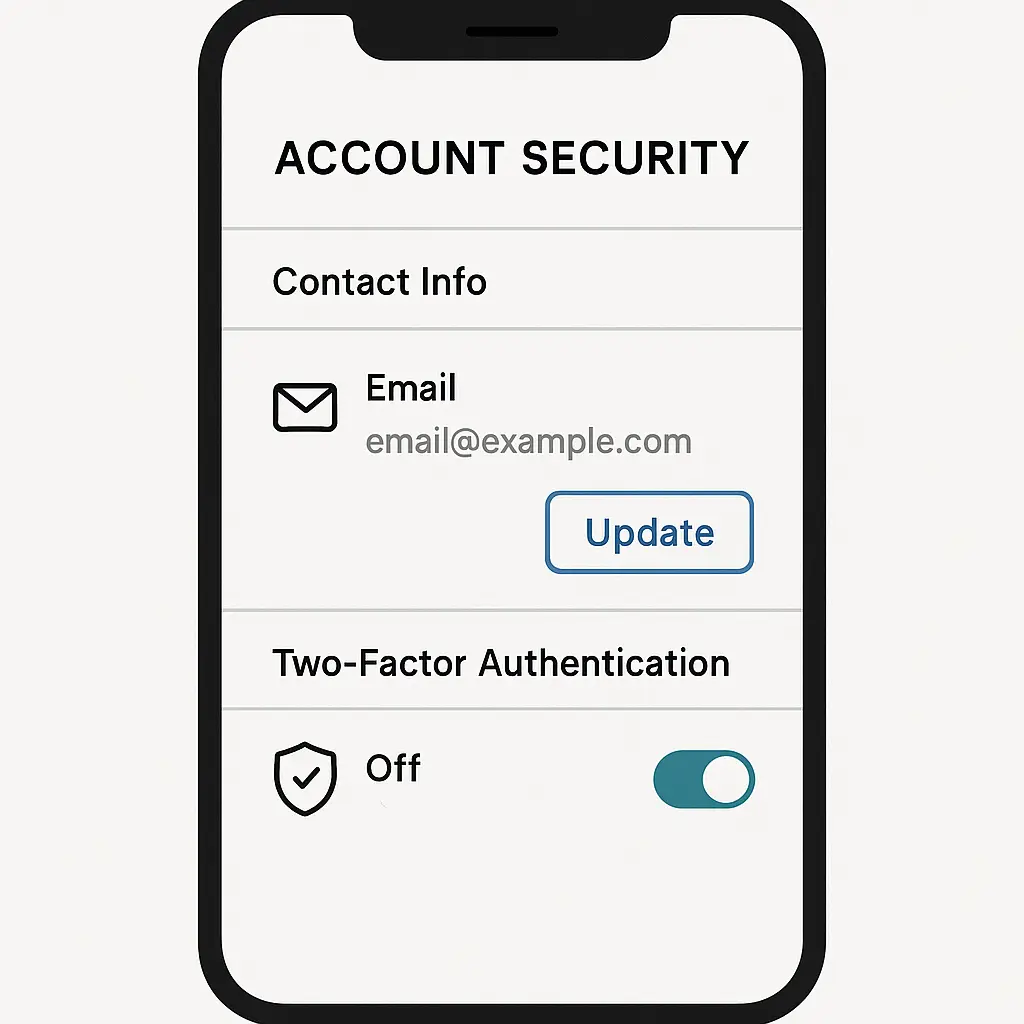
Most accounts don't support passkeys yet. When passkeys aren't an option, two-factor authentication is the next best defense. CISA recommends phishing-resistant MFA wherever possible, which means passkeys or hardware security keys. When those aren't available, authenticator apps are stronger than SMS codes.
Use a password manager for accounts that don't support passkeys. Generate a unique password for each account, store it in the password manager, and enable 2FA using an authenticator app. This setup isn't as strong as a passkey, but it's far better than reusing passwords or relying on SMS codes.
The Passkey-Password Transition Period
You'll run both passwords and passkeys for the foreseeable future. Services that support passkeys still require passwords as a fallback. This is intentional: if you lose access to all your passkeys, your phone, your password manager, your computer, you can still authenticate with your password and 2FA.
Don't delete your passwords when you enable passkeys. Keep them in your password manager as a backup. The goal is to authenticate with passkeys most of the time and fall back to passwords only when necessary, when using a shared computer, when your password manager isn't available, or when the service's passkey implementation has a temporary glitch.
Over time, as passkey support expands and implementations mature, the password fallback will become less necessary. But we're not there yet. Treat passkeys as the primary method and passwords as the emergency backup.
What Happens When You Use a Passkey
When you authenticate with a passkey, the service sends a challenge, a random string of data. Your device or password manager signs that challenge with the private key and sends the signature back. The service verifies the signature using the public key it stored when you created the passkey. If the signature is valid, you're authenticated.
This process happens in under a second. From your perspective, you click "Sign in with passkey," authenticate with Face ID or fingerprint, and you're in. No password to type, no 2FA code to enter, no phishing site that can intercept your credential.
The private key never leaves your device or password manager. The service never sees it. This is the fundamental difference between passkeys and passwords: passwords are shared secrets that both you and the service know, while passkeys are asymmetric, you hold the private key, the service holds the public key, and neither can authenticate without the other.
Troubleshooting Common Passkey Issues
If passkey creation fails, check that your browser and operating system are current. Passkey support requires recent software. Chrome 109+, Safari 16+, Edge 109+, Firefox 122+. iOS 16+, Android 9+, Windows 10+, macOS Ventura+.
If your password manager doesn't appear as a passkey storage option, check that the browser extension is installed and active. Some password managers require you to enable passkey support in settings. Bitwarden, for example, has a "Passkeys" toggle in settings that must be on.
If a passkey stops working, check that the device or password manager where it's stored is still signed in and syncing. Passkeys stored in iCloud Keychain require an active iCloud account. Passkeys stored in Google Password Manager require an active Google account. If you sign out, the passkey becomes inaccessible until you sign back in.
If you can't authenticate with a passkey on a shared or public computer, use your password instead. Passkeys are tied to your devices and accounts; they don't work on computers where you're not signed into your password manager or platform ecosystem. This is a feature, not a bug, it prevents someone else from using your passkey if they gain access to a shared computer.
Security Tradeoffs You're Making
Passkeys are stronger than passwords against phishing, credential stuffing, and database breaches. But they introduce new risks. If someone gains access to your password manager or your device's biometric unlock, they can use your passkeys. This is the same risk that exists with passwords stored in a password manager, but it's worth stating explicitly: passkeys are only as secure as the system that stores them.
Use a strong master password for your password manager. Enable two-factor authentication on your password manager account. Use a strong PIN or biometric lock on your devices. These layers protect the passkeys themselves.
Passkeys sync across devices, which means they exist in multiple places. This redundancy is convenient but increases exposure. If one device is compromised, the attacker gains access to all passkeys stored on that device. Revoke passkeys from lost or compromised devices immediately through each service's security settings.
Why This Matters
Passwords fail because they're shared secrets. When a service gets breached, attackers steal the password database and crack the hashes. When you fall for a phishing site, you hand over your password directly. When you reuse a password, one breach becomes a skeleton key.
Passkeys eliminate these failure modes. There's no shared secret to steal from a database. Phishing sites can't use your passkey because it only works on the legitimate domain. Passkey reuse isn't a risk because each passkey is cryptographically tied to a specific service.
The setup process takes time, around 10 to 15 minutes per account if you're methodical. But once configured, passkeys are faster and more secure than passwords. You authenticate with a glance or a touch instead of typing a password and entering a 2FA code.
I've set up passkeys on every account that supports them. The transition took a few weeks of steady work, but the result is an authentication system that's both stronger and more convenient than what I had before. If you're still authenticating with passwords and SMS codes, passkeys are the upgrade you've been waiting for.